|
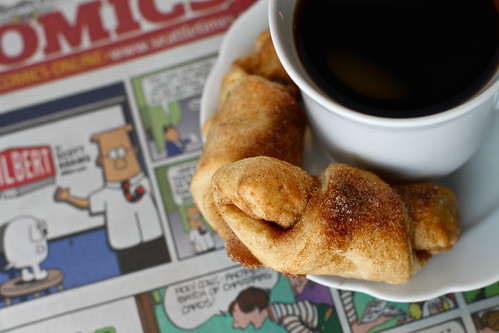
| Photo by Rachel Dedrickson |
The dryer is humming, bright overcast light is rushing through my office window, and I’m sitting down at my desk in fuzzy socks, black knit pants and a baggy t-shirt. It’s Sunday afternoon.
I have been on a food blog hiatus for almost one month on the dot now. Not intentionally, of course. Life gets in the way sometimes. You know how that goes, right? Well, I’m back now. I am back to tell you about my shenanigans in the kitchen this morning.
I have to start off with a short story first…
Over a month ago, while I was dropping off challah at Aunt Julie’s house, we were chit chatting about some of the recipes we want to work on together. That's our goal this year. I think we are both particularly interested in uncovering the mystery bolgi roll and perogis (not sure on spelling) Aunt Julie remembers Great Grandma Celia making.
Aunt Julie and I share an affection for keeping things. We both like to rip out magazine pages we think we'll get back to someday, and we both have project rooms full of stuff that only we understand the need for. I love visiting and seeing her projects and little odds and ends that have a special purpose for her - sometimes she's the only person I feel like relates to me in this way...keeping things is not a sin. There is nothing worse than thinking I wish I hadn't thrown that away.
Anyway, we sifted through boxes of family pictures I’d never seen before – pictures of Donny and Gram, Great Grandma Ruth, and Great Grandpa Julius. She showed me Donny’s WWDX Club badge, of which she let me keep. The most exciting part of the whole stroll down memory lane (or lack of memory lane) was that we got around to looking at her collection of cookbooks.
I was in awe at the plethora of bound treasure that made its home on the top of her maple kitchen cabinet shelves. It’s not because I don’t have a collection of cookbooks myself. Trust me, I am not poor in cookbooks let alone books in general. I think I could open up my own Half Price Books if I wanted to.
What caught my breath was her collection of vintage cookbooks from my grandmother’s kitchen. I guess I’d never thought twice about cookbooks of the past. Plus, up until this point in time, I have never believed there to be a trace of my grandma's cooking knowledge beyond her coffee splattered scribbles in her Passover composition notebook. Needless to say, I was fascinated at the cooking possibilities of yesteryears, of Gram's signature as it curled and curved on each hardcover we opened, of the books that may have taught Gram how to cook. I have been on the hunt for vintage cookbooks ever since.
My latest find is a 1956 copy of Love and Knishes, which I’ve gotten quite a kick out of reading page to page. More on this later. I also went hunting at a local antique mall and discovered Favorite Recipes of America: Desserts Volume 1 (© 1968). Candies, cookies, meringues, tortes, pastries and pies, puddings, cobblers, crisps, and short cakes – the table of contents proves the cookbook is littered with sweet possibility.
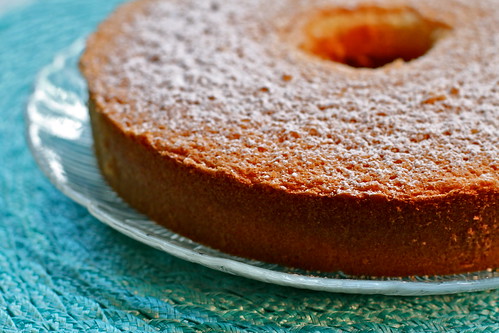
This morning I attempted Orange Sponge Cake written by Mrs. Donna M. Hayes of Florence, Alabama. I don't remember an orange sponge cake being in the family book of cooking spells, but it sounded delicious. Why not give it a try?
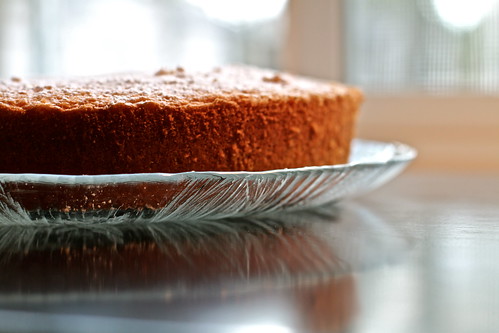
After about an hour and a half of mess and sweat in the kitchen, I think the venture turned out all right for a first attempt. That said, it will be worth making a second attempt. Why? Well, I got so incredibly anxious for the pan to cool, that I flipped it over onto a plate much too early. Bad idea. Bad idea, indeed. I need to learn to distract myself with something else and come back to flip the cake much later. If I had done so this morning, I suspect the shape of the golden sponge would have kept a bit better. Oh well, it still tastes good.
Nonetheless, I think Mrs. Donna Hayes was on to something. The sweet, citrus tang of the soft, bouncy yellow mound was worth the 10 am labor in the kitchen.
Now, back to my fuzzy socks and coffee.
Orange Sponge Cake
By: Mrs. Donna M. Hayes, Florence, Ala. North Alabama State Fair
Ingredients
6 egg yolks
1 ½ cup sugar
1 cup potato flour
2 tbsp. baking powder
½ tsp. salt
4 tbsp. water
1 tbsp. lemon extract
6 egg whites
1 cup orange juice
Directions
Beat egg yolks until pale yellow color. Gradually add 1 cup sugar, a little at a time, and beat well. Mix and sift dry ingredients; add to yolks. Add water and flavoring. Beat thoroughly. Beat egg whites until stiff, but not dry; fold into cake mixture. Pour batter into ungreased 9-inch tube pan. Bake in preheated 300-degree oven for 1 hour. Do not open oven door. Cool. (For the love of God - please let it cool all the way!). Remove from pan. Combine orange juice and ½ cup sugar (I used powdered sugar instead); pour over cake. Yields 8-10 servings.
 |
| Photo by Rachel Dedrickson |