 |
Photo by Rachel Dedrickson |
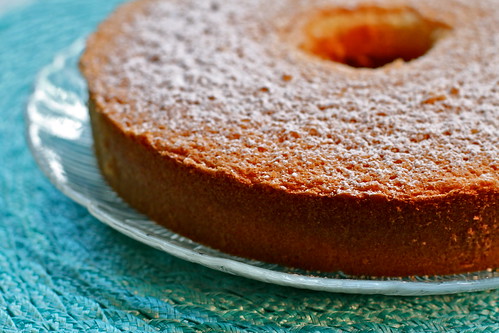
For the record, I am fully aware that Passover is long over. But I took some perfectly good pictures and this Passover sponge cake deserves its time to shine.
Sponge cake is usually the center piece dessert of our family Passover feasts. Gram was the queen of sponge cake, so she was always the the supplier of this airy treat as well as the the bowl of sugar-drenched strawberries and whipped cream that topped it all off.
Because I am inexplicably determined to uncover family recipes and food pearls, I naturally had an interest in recreating her sponge cake magic for this year's Seder.
Yellowed and coffee-stained notes were tucked gently between the pages of her cookbooks, but most of her scribbles were simply lists of ingredients with no instructions.
It seems as if Gram's sponge cake was a work in progress year after year. And I can understand because
my cake came out of the oven tasting like hers, but it didn't rise much or reach it's fully desired height. I am thinking maybe the eggs I used were too cold. Perhaps, room temperature eggs next year?
It won't be long until tiny scraps of paper start getting tucked in to my cookbooks. Some recipes are just a continual work in progress. Next year, if my family gives me another opportunity, I swear I am going to get it right!
Tell me, which recipes are you still working to perfect?
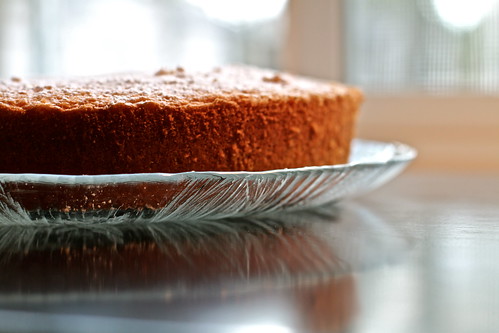 |
Photo by Rachel Dedrickson |
Gram's Passover Sponge Cake
Ingredients:
9 eggs (room temp)
1 1/2 cups of sugar
3 teaspoon of vanilla
1/4 cup potato starch
3/4 cup cake meal
Directions:
Preheat oven to 350 degrees.
Separate the egg whites and yolks in to two separate bowls.
First, gradually beat sugar into the egg white bowl until egg whites are light colored and thick (almost stiff, but not quite).
Next, sift the potato starch and cake meal together into the bowl of egg yolks.
Fold the egg whites and sugar into the egg yolks/dry ingredient bowl and gently fold together.
Pour the batter into an angel food cake pan (do not grease the pan!). Bake until the cake is golden brown and springs back when touched in the center, and a toothpick inserted into the center comes out clean, 50 to 60 minutes.
Immediately invert the pan onto its feet or the neck of a bottle and let cool completely. Run a thin-bladed knife around the outer sides of the pan and around the inside of the tube to loosen the cake. Invert the pan onto a cake plate and lift off the pan. Dust with powdered sugar. Serve with strawberries and whipped cream.