Showing posts with label baking. Show all posts

Tuesday, January 10, 2012

Reese's Cookies

IMG_0613

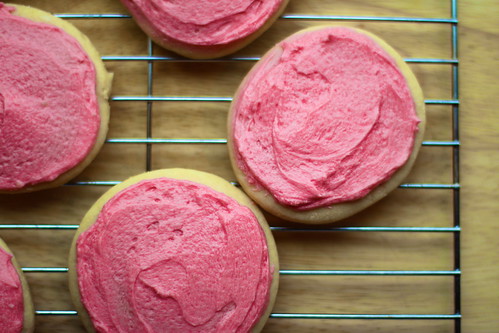
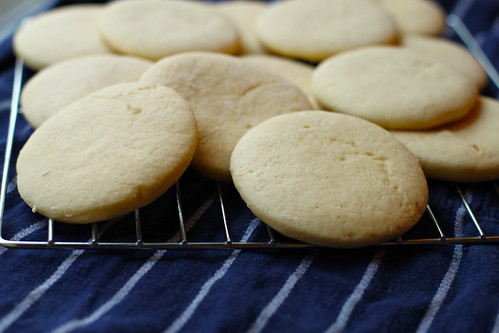
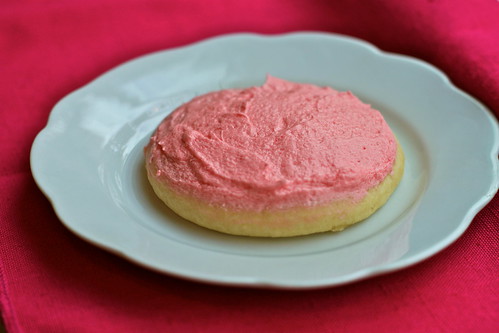
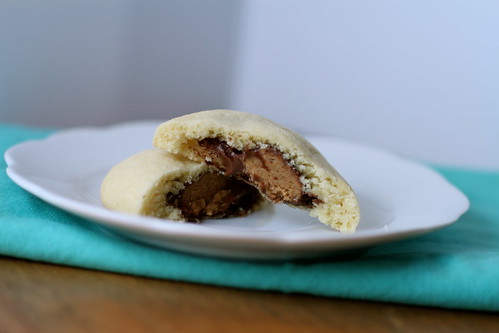
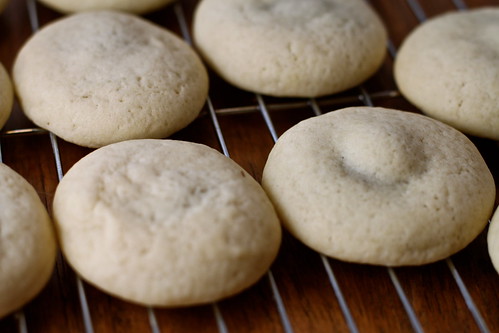
At first glance you see a sugar cookie, but then you take a bite, and you get a sneaky suspicion that something wonderful has snuck its way into the middle of your cookie (see above). Like a mini Reese's peanut butter cup...

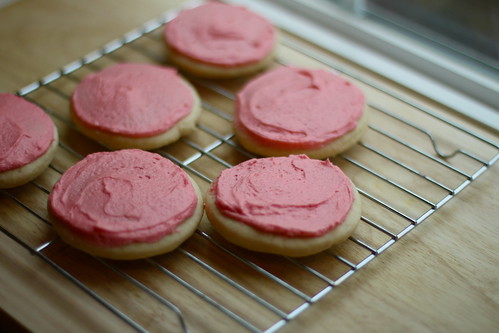
I made A LOT of cookies this past holiday, but these Reese's cookies are probably my favorite of the lot. Soft sugar cookies, gooey chocolate peanut butter center....uh, hello!

I came across this fabulous idea on With Style and Grace, and I had to give it a try. I tested out the recipe both with Reese's Peanut Butter Cups and with York Peppermint Patties. I'll definitely keep experimenting with different kinds of candy...Rolos anyone? I'm excited to hear what your great ideas are.

Whether you've still got loot leftover from Halloween , or you're in the mood to surprise someone mid-bite - these are a fun cookie to bake. Think of all the candy variations there are to explore.

But seriously, who can go wrong with a peanut butter chocolate combo? Happy baking!


IMG_0591

Reeses Cookies
Recipe from With Style And Grace - originally Picky Palate

Ingredients
2 sticks (1 cup) butter, softened
1 cup granulated sugar
3/4 cup brown sugar
2 large eggs
1 tablespoon vanilla extract
3 1/2 cups all-purpose flour
1 teaspoon baking soda
1/2 teaspoon salt
3/4 cup chocolate chips (optional - I left them out)
Reeses Peanut Butter cups

Directions
Preheat oven to 350 degrees F. Line your baking sheets(s) with parchment paper and set aside.

Using an electric mixer, cream together butter and sugars until well combined. Add eggs – one at a time and then vanilla, mix until well combined.

Mix together flour, baking soda and salt in large bowl. Carefully add the dry ingredients to the wet. Mix in the chocolate chips if using. Take one scoop of cookie dough, place Reeses peanut butter cup on top and then take a second scoop of cookie dough and place on top of the Reeses. Press the cookie dough together, sealing the edges and then carefully mold into a ball.

Bake 9-13 minutes. Let cool for 5 minutes before transferring to cooling rack. Enjoy!

Saturday, November 19, 2011

Pink Cookies

IMG_0771

I spent a lot of time with Gram and Mom as a little girl. We’d watch soap operas like As The World Turns together, and I’d tag along on shopping excursions in my pink leggings, turtlenecks, and big head bows.

Often times, we'd visit Nordstrom - the land of twirl-worthy piano music and a sea of clothing. I used to love hopping from clothes rack to clothes rack hiding in the center of the display as ladies perused the season’s latest fashions. I swear no one could see or hear me despite my audible giggles and little, mary jane shoes poking out from under the hanging sleeves and pant legs.

I could stay entertained clothes rack hopping for hours. But the best part of our trips to Nordstrom was the pink cookies. Hands down.

IMG_0661


When I treat myself to coffee at the Nordstrom Espresso Bar now and again, I always eye the pink cookies and feel a sense of nostalgia overcome me. They remind me of being a kid. When coffee and clothes from Nordstrom were of no interest to me at all. When I did not know how to tell time, drive a car, or pay a bill. When nap time and coloring books were the center of my world. My, how times have changed.

You Seattlites out there know there is something special about these cookies. There is nothing like them. You can sink your teeth in to the pink circle with ease. They're creamy, buttery, soft, and, hello, pink. I like that. What could be better?

IMG_0583


Pink Cookies
Adapted from All Recipes

Ingredients

1 cup organic butter
2 cups white sugar
4 organic, cage-free eggs
3/4 cup organic whole milk
6 cups all-purpose unbleached flour
1/2 teaspoon sea salt
3 teaspoons baking powder
1 teaspoon vanilla extract

Directions

In a large bowl or mixing stand, cream the organic butter and sugar together. Add the eggs one at a time, mix well. Stir in the milk and vanilla.

In a separate bowl, sift together the flour, salt and baking powder.Gradually stir the flour mixture into the creamed mixture until everything is well blended.

Form dough into a ball and cut into two pieces. Wrap each half with saran wrap. Place both pieces of dough in the freezer for approximately one hour.

Pull the chilled dough out of the freezer and preheat the oven to 350 degrees. Cut parchment paper and layout over a cookie sheet.

Take each half of chilled dough and roll it out on a lightly floured surface to approximatley 1/2 inch thick. Take the largest round cookie cutter you have (these cookies are meant to be fairly large) and cut out circles from the dough. A clean tuna can works well too, if you do not have a circular cookie cutter.

Place circled cut-outs 1-2 inches apart onto the prepared cookie sheet.

Bake for 10 to 12 minutes in the preheated oven. The tops of the cookies should spring back to the touch like a cake. Cool completely on wire racks before frosting.

IMG_0630

Pink Frosting

Ingredients
2/3 cup butter, softened
4 cups confectioners' sugar
2 tablespoons milk
2 teaspoon vanilla extract (optional)
6 drops red food coloring

Directions
In a medium bowl, cream together the butter, confectioners' sugar, and milk until light and fluffy, about 3 to 4 minutes. Beat in the vanilla and food coloring. Spread over cookies.

IMG_0725

IMG_0782


Monday, April 11, 2011

Brioche Bliss

IMG_0005
Photo by Rachel Dedrickson

I have never been to France, yet I understand how a piece of brioche is something to covet. Brioche is sweet bread made with eggs and butter. It is somewhat cake-like. It's fluffy and buttery all the way through.

But brioche is not just bread. Brioche is an experience! Any decent brioche encounter incorporates honey or dab of raspberry jam and, of course, coffee or tea to wash it down.

Brioche also makes wonderful bread for French toast, which is a breakfast item I intend to tackle later this week.

There is not much else to say except...


Bon appetit!


IMG_0026
Photo by Rachel Dedrickson


The Simplest Brioche

Ingredients:
8 3/4 oz (1 2/3 cups) all-purpose flour
2 3/4 oz butter, at room temperature
2 eggs, at room temperature
1 dose dry baker’s yeast (1 Tbsp)
2 Tbsp fine sugar
1/3 cup warm milk
1 pinch salt
1 egg yolk for glaze


Directions:
In a bowl, mix the flour with the yeast, make a hole in the middle.


Add the warm milk mixing with the tip of your fingers (if using a stand mixer, pour the milk slowly and steadily while mixing, with the hook attachment.)


Add the sugar and a pinch of salt, then add the soft butter, piece after piece, waiting each time that each piece is absorbed.


Then one by one, add the eggs, mixing well between each. Work the dough until it is elastic and detaches from your fingers more easily (or from the bowl of the stand mixer).


Cover and let rest in a warm place, away from drafts, for two hours, until it doubles in size.


Work the dough again for 10 min and divide it in four balls. Place them in a greased rectangular mold and cover. Let rise for an hour again.


Preheat the oven at 400 F.


Brush the brioche with the egg yolk mixed with a dash of sugar. With a pair of scissors, make small cuts at the top of each ball.


Place in the oven to bake for 10 min then reduce the heat to 350 F and bake for about 20 to 30 min.


Remove, unmold and let cool on a rack.


Enjoy!


IMG_0020
Photo by Rachel Dedrickson

Thursday, April 7, 2011

Whole Wheat Quinoa Muffins

IMG_0020
Photo by Rachel Dedrickson
I ordered a drink. An Americano I think. It was Saturday morning. I was in my comfy cotton knit pants, and an oversized WSU sweatshirt with fluffy Ugg boots – no makeup. My guard was definitely down.

And then it happened.

The pastry case giggled and gleamed at me, and a raspberry scone batted an eye. I was done for.

Was it delicious? Couldn't tell ya. I must have eaten the entire thing while waiting for the barista to call out my drink. The butter-filled triangle was demolished in minutes. Crumbs in the brown paper bag. Did you hear me? Kaput!

I can’t help it. I like adore baked goods. You see, while I've been scouring my favorite food blogs for savory dinner recipes, a baking wish list has appeared in my notebook instead. Lemon scones, red velvet cakes, banana creme pie, almond joy cookies, and rosemary quick breads are a revolving mental slideshow. I suppose there are worse things to daydream about.

My fixation with flour, butter, and sugar is strange. Mom was not and still is not a huge baker. I remember brownies, biscotti, yellow cake from the box, and an occasional chocolate chip cookie graced the granite counters of the kitchen on SE 52nd Place, where I grew up. But baking experiments were not the norm in our household.

This past weekend, I came across Enlightened Cooking written by Camilla Saulsbury. I’m drawn to her photos and posts because, like me, this blogger has an affinity for baking. But what’s more? Her recipes focus on whole foods. Clean food. Or as she calls it, “superfoods”.

How about whole wheat flour instead of white flour? How about adding in quinoa? How about swapping out butter for olive oil? Or how about throwing in some “boom” by stirring a few dried blueberries into the batter?

Yes, I think that sounds like a great idea. A compromise. A way to add some substance to the confection. Sign me up!

These whole wheat quinoa muffins satisfied my baking bug…for now. I’ve been eating them all week as an accompaniment to my morning Hair Bender java fix from Stumpton Coffee. Such a great combination these two! The quinoa muffins are chewy and hardy – with a little touch of sweet. The coffee is mellow, creamy, caramel-based for washing it down.

IMG_0037
Photo by Rachel Dedrickson


Whole Wheat Quinoa Muffins
By Camilla Saulsbury

Ingredients:
1 cup quinoa, rinsed in a mesh sieve
2 cups white whole wheat flour (i.e. King Arthur brand)
1-1/2 teaspoons baking powder
1 teaspoon salt
1/2 teaspoon baking soda
1/2 cup dried cranberries or any dried fruit you like (I used dried blueberries)
3/4 cup lowfat milk
2/3 cup honey (or agave nectar, brown rice syrup, or maple syrup)
1/4 cup light olive oil or other neutral cooking oil (e.g., canola, safflower)
1 large egg
1 teaspoon vanilla extract

Directions:
Preheat oven to 350F.

Grease 1 standard 12-cup muffin tin.

Bring quinoa and 2 cups water to a boil in a medium saucepan set over medium-high heat. Reduce to a simmer; cover, and cook 15-20 minutes until water has been absorbed and quinoa is tender. Cool.

In a medium bowl, whisk together flour, baking powder, salt, cranberries, and the cooked quinoa.

In a small bowl, whisk together the milk, honey, oil, egg, and vanilla. Add milk mixture to flour mixture, and stir just until combined. Divide the batter among the prepared muffin cups.

Bake 25-30 minutes until toothpick inserted into the center of a muffin comes out clean. Cool muffins in pan, 5 minutes; transfer to a wire rack to cool completely. Store in an airtight container up to 5 days.

Makes 12 muffins.

Wednesday, December 22, 2010

The 'Go To' Family Treat

Photo by Rachel Dedrickson
 Lately, I’ve been really focusing on loving and appreciating all the good things I’m blessed with in my life. Good friends, a close-knit and supportive family, a great job, a roof over my head, a cuddly puppy dog, and a person to come home to that loves me unconditionally – the real me.


I guess what I am trying to say is that it is so easy to get caught up looking at what’s next and what everyone else is doing and lose the glass-is-actually-full (not half-full…I really mean brimming over full) perspective. Why can't we be content? It's OK not to be reaching for the next ladder rung. Sometimes, we can allow ourselves to "float" instead of climb.


All of this to say, I recently made classic family brownies. It felt fitting with where my head is at lately. After all, isn’t one of the simplest pleasures and most easily appreciated foods brownies? Come on! I dare you to tell me that you don’t love the smell of fresh homemade brownies wafting from the oven? Or maybe it’s sinking your teeth into a 2x2 chewy chocolate square while it’s still warm? Delicious. Comforting. Absolutely timeless.


Mom and Aunt Julie said that the main ‘go to’ treat around the house while they were growing up was brownies from scratch…mainly because Donny (my Grandpa) loved them. If Donny were still around, I can imagine how my baking activity would increase exponentially just for him!


Anyway, the brownie from scratch recipe my Mom and Aunt reference comes from the packaging of the unsweetened Baker’s chocolate box. Are you familiar? You know, it’s the one pot brownie recipe. The ones where you melt the chocolate and butter in the pan, quickly add eggs one at a time, then the flour, and salt? The key, to this family’s recipe however, is the VANILLA. We always use extra vanilla - twice as much as the recipe calls for. Or, if I’ve learned anything from Mom, it’s to forgo measuring the vanilla entirely whenever a recipe calls for it. In other words, there is absolutely no such thing as too much vanilla. Just “eye” it…or pour blindly. Same thing, right?!


The other story that goes along with the family brownie recipe is the fact that it is the first thing I ever tried to bake. You see, I thought it would be fun to surprise my family with fresh brownies at age 12. While Mom was out, I took to my Amelia Bedelia ways and began to follow the directions: Preheat the oven and grease the bottom of the pan. Can you guess what I did? Well, of course, I greased the BOTTOM of the pan like the directions told me to. Let’s just say Mom knew I was up to something when she got home…not because my brownies smelled amazing, but because there was canola oil all over her counters from the bottom of the brownie pan. So make sure (and I will too), that you grease the inside bottom of the pan when making these. Ok? Great!


Bake these up and indulge in a glass of cold milk to wash down the chocolate goodness. You can afford it. After all, the glass is brimming over full in my book.


Baker's One Pot Brownie Recipe

Ingredients
1 package (8 squares) BAKER'S Unsweetened Baking Chocolate
1 cup butter (2 sticks)
5 eggs
3 cups sugar
1 tablespoon vanilla (remember - more than this is encouraged!)
1 1/2 cup all-purpose flour

Directions
Melt chocolate and butter in saucepan over very low heat, stirring constantly. Cool slightly.
 
Beat eggs, sugar and vanila in large mixer bowl on high speed for 10 minutes. Beat in chocolate mixture on low speed. Add flour, beating just to blend. Spread in greased 13x9-inch pan.
 
Bake at 375 degrees for 35 to 40 minutes or until cake test inserted in center come out almost clean (do not overbake). Cool in pan, then cut into squares.
 
Makes approximately 32 brownies.


Photo by Rachel Dedrickson


Friday, July 30, 2010

Have Your Cake


Dear Foodies,

I know that there are fancier desserts in the world, but who can turn down a Pilsbury Funfetti cupcake? It's such a nostalgic, happy treat. Not to mention, cupcakes are all the rage right now.

I made this batch the other night and decided to go with a black and white theme. I used black and white polka dot cupcake wrappers and three different toppings.

First, I frosted each cupcake with classic vanilla frosting, then I dipped the top of each cupcake in Oreo crumbles, shaved coconut, or white pearl sprinkles. The beauty of these topping choices is that they are forgiving - no steady hand required. I'm really happy with how they turned out, and they tasted delicious.

Tell me, what is the best cupcake you've ever had?

Related Posts Plugin for WordPress, Blogger...